[elementor-template id=”1129″]
PLINE (Command)
Command description
Creates a single (planar) 2D polyline, that is made up of line and/or arc segments.
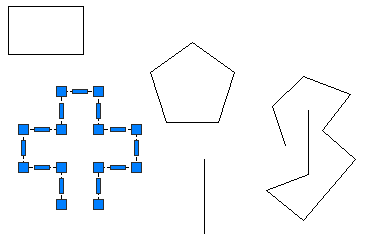
This can be a complex subject and there are also a number of ways that create a polyline (pline) object without using the command itself.
Rectangle
Polygon
Pedit
Join
Boundary
Hatchgenerateboundary
Command prompts
Specify first point
Sets the starting point for the pline. Click a point location. With object snaps or grid snap turned on, the points will be placed precisely. You can also enter coordinates either at the command line or depending on your settings at the dynamic cursor. If instead, you press Enter at the prompt, a new pline starts from the endpoint of the most recently created line, polyline, or arc, though not Polylines created using the other methods
Specify next point
Specifies the next point of the pline segment. Watch the command prompt because after picking the starting point, you now have a number of options available for the next pline segment,
arc
halfwidth
length
undo
width
You can also use polar and object snap tracking together with direct distance entry or transparent commands like ‘from’ or ‘cal’
Find the command
Ribbon – Home(TAB) – Draw(PANEL)

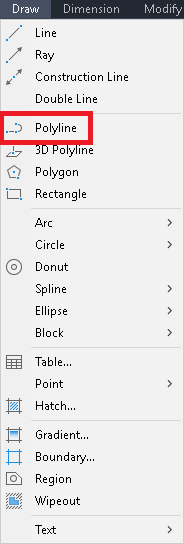
Menu – Draw(TAB)

Draw(TOOLBAR)
![]()
Command line type “pline”
At the command line you can type the word ‘pline’ or ‘polyline’
Alias type “pl”
Just typing the letters ‘pl’ will also start the line command
Grips

A polyline has two types of grips associated with it, END grips and a MID grip, For each segment.
When grip editing the END grips will allow you to distort the original pline to change its position, angle, length and change the shape of the overall pline.
The MID grip can be used to alter the placement of individual segments, the segment holds its orientation and connected segments are stretched.
When using osnaps from other objects a pline can also display points for PERpendicular, NEArest and CENter snap for arc segments, as well as INTersection and APParent intersection, and when a polyline is closed you can also use the Geometric CEnter osnap.
Editing
You can directly change a pline by using grip editing, or by using one of the following commands
- Move
- Stretch
- Rotate
- Scale
- Lengthen
- Trim
- Extend
- Join
- Pedit
Two notable points here are
Lengthen only works on open polylines and will work on the “side/end/half” of the polyline selected and the behaviour differs due to the type of the last segment line or arc, and whether the resulting polyline is smaller or larger.
Trim works with external objects that cross the polyline, or if you only select the polyline you can trim out an individual segment or segments without the need to use other objects.
Properties
The following properties are displayed in the properties palette when a pline is selected.
General
· Color
· Layer
· Linetype
· Linetype scale
· Plot style
· Lineweight
· Transparency
· Hyperlink
· Thickness
Geometry
· Current Vertex
· Vertex X
· Vertex Y
· Start segment width
· End segment width
· Global width
· Elevation
· Area
· Length
Misc
· Closed
· Linetype generation
List properties
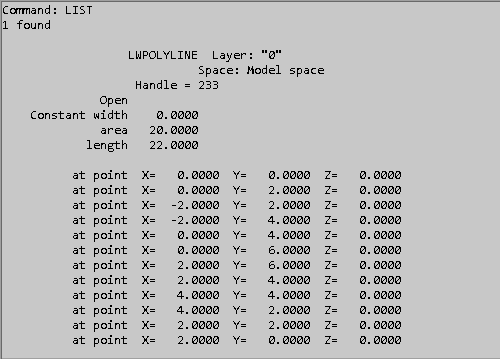
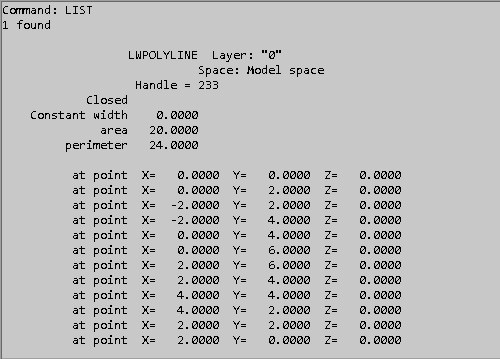
When using the List command the following properties are noted. With a slight variation for open or closed polylines

The difference being whether List reports a length (open polyline) or a perimeter (closed polyline). In both cases it will show an area, for an open polyline this is calculated using an imaginary straight line that conects the start and end points, and for a single line will show 0 (zero).
You should be aware that you can close a single line polyline, but this will create a polyline with 2 segments one on top of the other and will give a perimeter total which is the sum of the 2 segments. The area remains zero.

This can have additional information if the properties of a pline are edited so you can also have the information for
- Color
- Linetype
- Linetype scale
- Plot style
- Lineweight
- Transparency
- Hyperlink
- Thickness
if these have been changed from the default values.
