TOP
Description
Create the model
Find the command
Grips
Editing
Properties
Listed properties
Variables
Script example
Macro Example
3D
Comments
Animation 3D
Description
On the Home page there is an animation of a rotating cube, in this post I’m going to try and show how it was created. The model itself is created in LT.
From there you have to change the vpoint so you can view the model from a number of positions and in this case this is a circular path with 30 steps, created with the -vpoint command.
From each view, you need to first zoom the model to a predetermined size and use the ‘jpgout’ command to save a series of still images into a windows folder.
You can do this manually but it would take quite a while and the chance of making a few mistakes along the way is high (though not disastrous). So using Excel to build a script using exported data is one way to help automate the task.
After that, you will have to use an image software package to create the animation, Gimp can handle all of the steps needed for this, plus its free.
Create the model
We are just going to use regions and mtext for this model. A region can be used in combination with the hide command to build 3D models the beauty of regions is you can use the boolean operations on them (join, subtract, and interfere) though we won’t be using those here. The disadvantage is they can’t be stretched or edited with grips.
Specifies the endpoint of the line segment. You can also use polar and object snap tracking together with direct distance entry or transparent commands like ‘from or ‘cal
Find the command
Ribbon – Home(TAB) – Draw(PANEL)

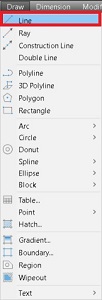
Menu – Draw(TAB)

Draw(TOOLBAR)
![]()
Command line type “line”
At the command line you can type the word ‘line’
Alias type “l”
Just typing the letter ‘l’ will also start the line command
Grips

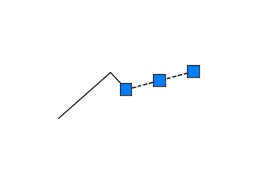
A line has two types of grips associated to it,
END grips and a MID grip.
When grip editing the END grips will allow you to distort the original line to change it’s position, angle and length.
The MID grip can be used to alter the placement, rotation and scale of the line.
When using osnaps from other objects a line can also display points for PERpendicular and NEArest, as well as INTersection and APParent intersection
Editing
You can directly change a line by using grip editing, or by using one of the following commands
Lengthen
Trim
Extend
Properties
The following properties are displayed in the properties palette when a line is selected.
General
· Color
· Layer
· Linetype
· Linetype scale
· Plot style
· Lineweight
· Transparency
· Hyperlink
· Thickness
Geometry
· Start X
· Start Y
· Start Z
· End X
· End Y
· End Z
· Delta X
· Delta Y
· Delta Z
· Length
· Angle
List properties
When using the List command the following properties are noted.

This can have additional information if the properties of a line are edited so you can also have the information for
- Color
- Linetype
- Linetype scale
- Plot style
- Lineweight
- Transparency
- Hyperlink
- Thickness
if these have been changed from the default values.
