CIRCLE (Command)
Command description
Creates a circle.
Command prompts
Specify center point for circle or [3P/2P/Ttr (tan tan radius)]:
LT expects you to either pick a point with the mouse (or pick a point on existing geometry). With object snaps or grid snap turned on, the points will be placed precisely. Or you can also enter coordinates either at the command line or depending on your settings at the dynamic cursor. This point is the centre of the circle. Once picked the second prompt will ask you for the circle radius, again you can pick a point with the mouse or enter a radius value directly with your keyboard, you also have the option to choose the diameter by selecting that at the command line prompt, using the down arrow key on your keyboard, or just pressing the letter “d”. When LT is expecting a diameter the cursor preview will alter slightly showing you were the pick point is going and previewing the circle circumference halfway between the centre and that point.
If at the first centre point prompt instead, you press Enter, an error message is shown and you are again prompted for the centre of the circle.
At the first prompt you also have the option to choose different ways of constructing the circle [2Point, 3Point, Tan Tan Radius] which you can access by typing “2, 3 or ttr” or pressing the down arrow on your keyboard and selecting an option with your mouse or multiple press on the down arrow until the correct option is highlighted then press enter. Choosing one of these versions for creating a circle will alter the prompts you see.
Specify radius of circle or [Diameter]:
LT expects you to pick a point giving the radius of the circle, you can just pick a point in space with the cursor, or pick an osnap on existing geometry, or just enter a numeric value using your keyboard. You can also type the letter “d” to change to inputting the circle diameter, if you then pick a point it will use the distance from the centre of the circle to your second pick point and use that distance for the diameter instead of for the radius.
When picking points LT will allow the usual command modifiers and tracking as well as let you use the ‘cal command transparently. The circle command itself has various options, default is pick centre point followed by pick radius?diameter,
Find the command
Ribbon – Home(TAB) – Draw(PANEL)

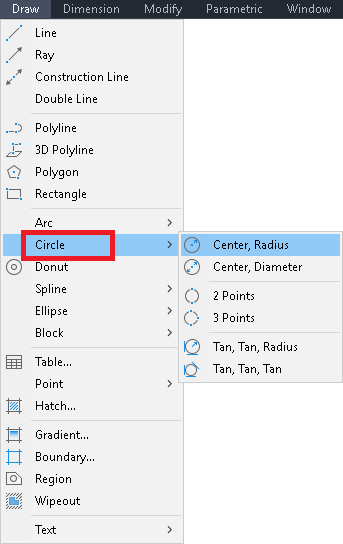
Menu – Draw(TAB)

Draw(TOOLBAR)
Command line type “circle”
At the command line you can type the word ‘circle’
Alias type “c”
Just typing the letter ‘c’ will also start the line command
Grips

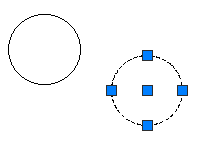
A circle has 5 grips and these are associated to the Center and Quadrant osnaps.
When grip editing the Center grip will allow you to move the circle to change it’s position. And the grips on the edge of the circle will let you alter the radius. clicking on a grip will make it the hotgrip and pressing the spacebar allows you to cycle through various editing options.
**Stretch** in the case of a circle this option will only move the circle if you select the center grip, edge grips will change the radius
**Move**
**Rotate** for a circle rotating about the center alters nothing
**Scale**
**Mirror** for a circle mirror with the center grip alters nothing
When using osnaps, drawing from other objects, a circle can also display points for PERpendicular and NEArest, as well as INTersection and APParent intersection as well as TANgent
Editing
You can directly change a line by using grip editing, or by using one of the following commands
- Move
- Stretch
- Rotate
- Scale
- Trim
- Extend – you can’t extend a circle, but you can extend other geometry too a circle.
Properties
The following properties are displayed in the properties palette when a line is selected.
General
· Color
· Layer
· Linetype
· Linetype scale
· Plot style
· Lineweight
· Transparency
· Hyperlink
· Thickness
Geometry
· Center X
· Center Y
· Center Z
· Radius
· Diameter
· Circumference
· Area
· Normal X
· Normal Y
· Normal Z
List properties
When using the List command the following properties are noted.

This can have additional information if the properties of a line are edited so you can also have the information for
- Color
- Linetype
- Linetype scale
- Plot style
- Lineweight
- Transparency
- Hyperlink
- Thickness
if these have been changed from the default values.
Variables
The following is a list of the variables that can have an affect on Circles.
- Elevation
- Thickness
Script example
Read the section on creating scripts for full details on how scripts work in Autocad, the following is an example for using the line command in a script
——script start——
[membership level=”0,1″]
[/membership]
[membership level=”2,3″]
circle
non
0,0
5
non
0,5
5
non
5,0
5
non
0,-5
5
non
-5,0
5
[/membership]
——script end——
Description
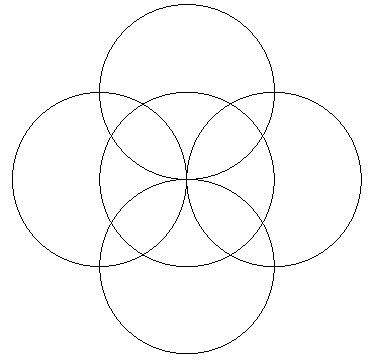
 This short script file will draw a simplified flower with 4 petals. Make sure there are no extra spaces at the end of lines in a script, and a blank line is totally empty (no spaces).
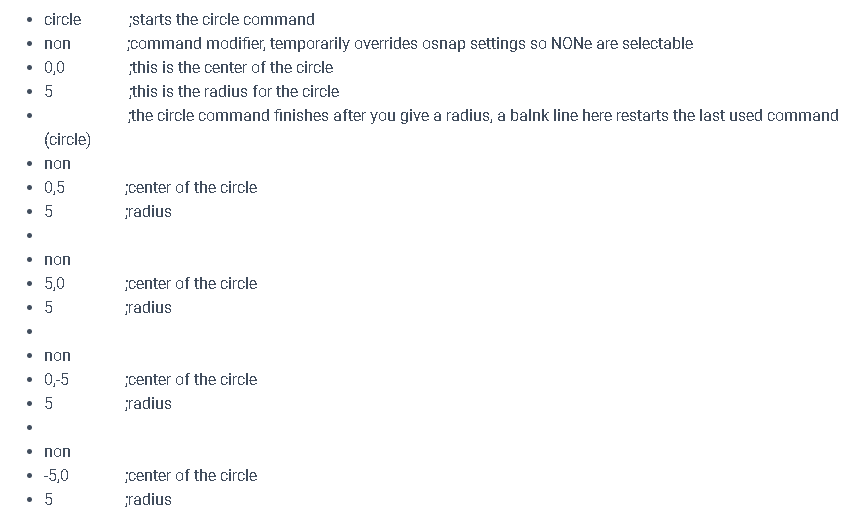
Before entering coordinates you should always use the command modifier ‘non’ to stop Autocad snapping to osnap points, this subject is covered in the scripting section but it is always a good idea to do this before every single set of coordinates in a script as it is only valid for one point at a time.
[membership level=”3″]
[/membership]
Macro example
This short macro will draw a simplified flower with 4 petals. Make sure there are no extra spaces Autocad treats a space the same as a semicolon and see’s them the same as using the key.
Before entering coordinates you should always use the command modifier ‘non’ to stop Autocad snapping to osnap points, this subject is covered in the macro section but it is always a good idea to do this before every single set of coordinates in a macro.
[membership level=”0,1″]
[/membership]
[membership level=”2,3″]
^C^C^Ccircle;non;0,0;5;;non;0,5;5;;non;5,0;5;;non;0,-5;5;;non;-5,0;5;
[/membership]
3D
The centre point of a circle can be placed anywhere in 3D space if you enter 3D coordinates, but once you have located the centre point it is drawn parallel to the UCS plane however, you can draw a circle or copy an existing one into any UCS plane that you set, or use the align command and pick 3 points to move an existing circle to a different plane of your choosing.
If you have the variables ‘elevation’ or ‘thickness’ set to anything other than default then any new circles will inherit these properties, unless you use 3D coordinates then elevation will be ignored.
A circle is linked to the UCS, it must be on or parallel to the UCS plane, with that being the case any thickness is always perpendicular to the circle.
A circle with thickness is one of the objects that give a solid appearance when you use the ‘hide’ or ‘shade’ commands having sides but also closed ends.


